
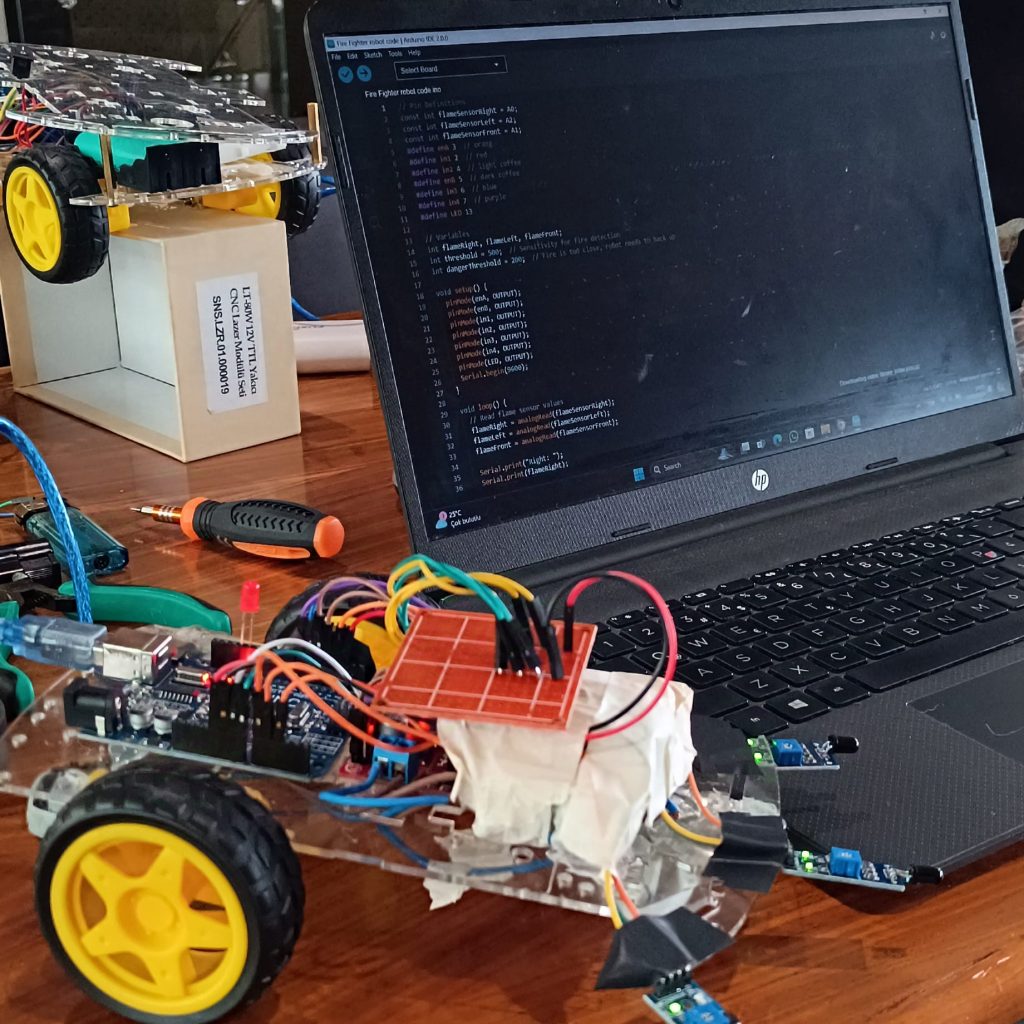
This project was one of our most exciting and challenging endeavors yet. We designed a robot car capable of detecting fire locations and triggering an alarm when a fire is detected. This required precise sensor integration and custom coding to ensure the car responds effectively to fire hazards.
Elements Used:
– Fire Sensors
– Arduino
– LED
– Alarm Buzzer
– 2 DC Motors
– On/Off Button
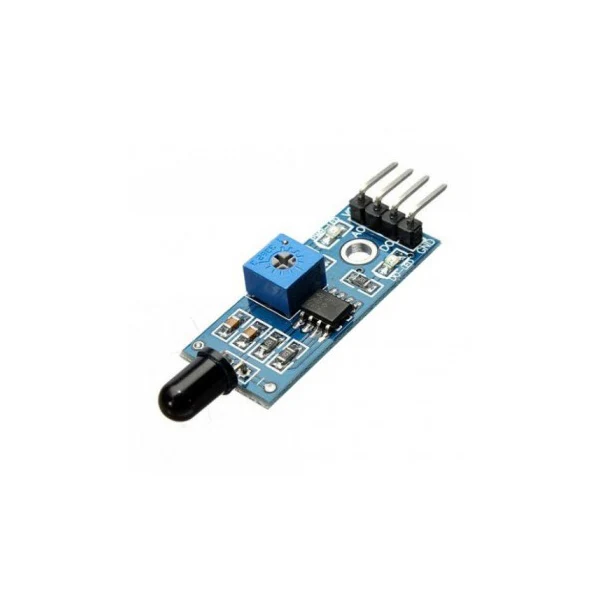

Fire Sensors:
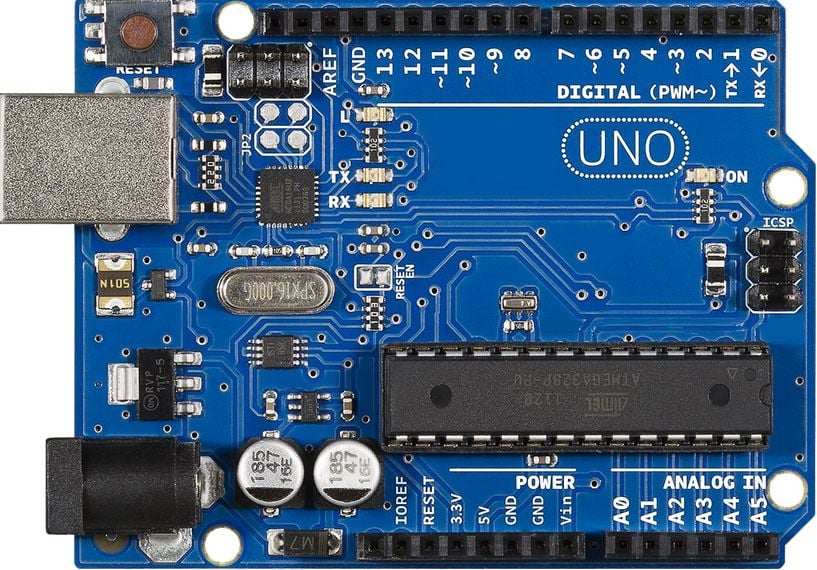
These sensors are used to detect the presence of fire or smoke. They sense excess heat or particles produced by a fire and send a signal to the system to alert the user or activate another device, such as an alarm or a fire suppression system.Arduino:
Arduino is a programmable microcontroller board used in various electronic projects. It reads inputs (like signals from sensors) and controls outputs (such as motors or lights). You can program it to perform specific functions based on the data it receives from sensors.LED (Light Emitting Diode):
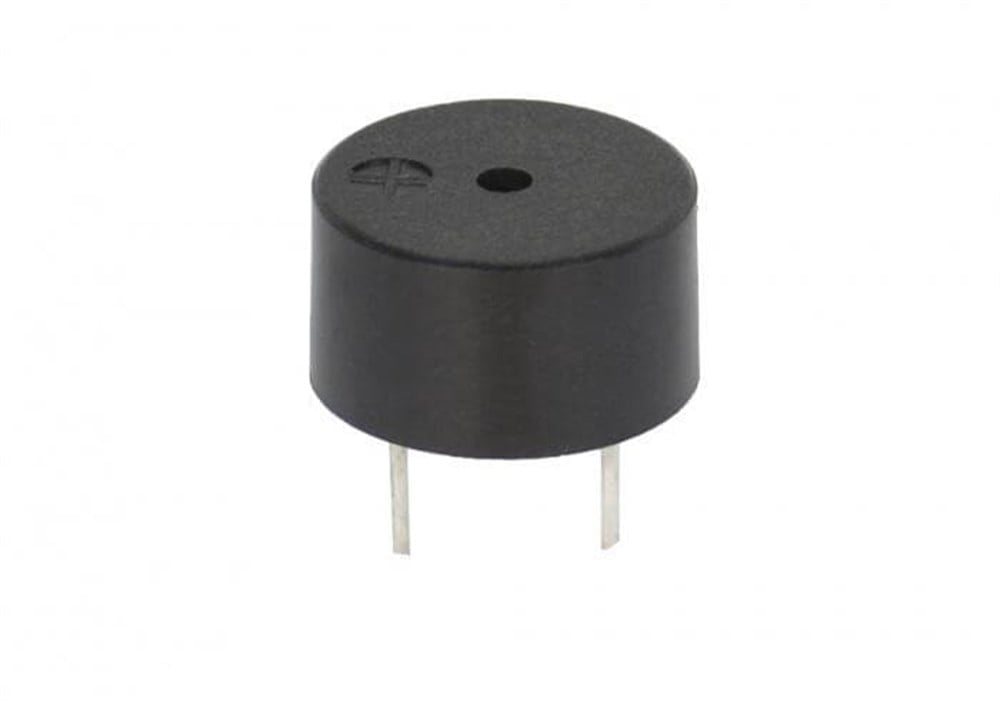
An LED emits light when an electrical current passes through it. It is commonly used to provide visual signals, like power indicators or alerts. LEDs come in various colors and can be controlled by Arduino or other electronic circuits.Alarm Buzzer:
A small device that produces a loud sound when activated. It’s used in projects to alert the user when something specific happens, like detecting a fire. The buzzer can be controlled by Arduino to activate under certain conditions.DC Motors:
DC motors are used to move parts of a project, such as the wheels of a robotic car. They work when supplied with electrical power, and their speed and direction can be controlled using a controller like Arduino.On/Off Button:
A simple switch used to control the power flow in a circuit. When pressed, it completes or breaks the circuit, allowing control over whether other components in the system receive power.
Map of car
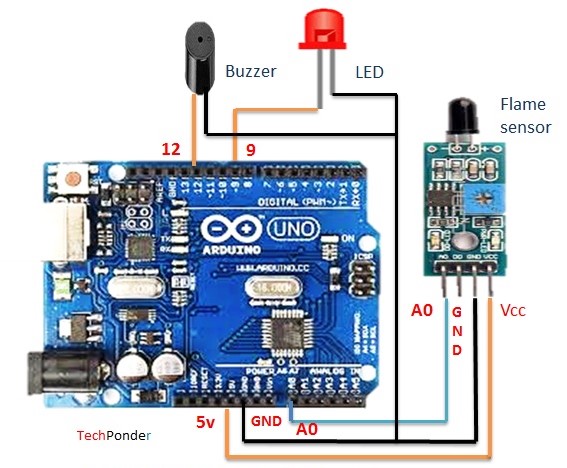
Circuit Design
We built the car from scratch, starting with the integration of fire sensors and wiring them to the Arduino. The LED and alarm were added to signal fire detection, while the motors powered the car’s movement. The On/Off button was implemented for easy control.
The Code
One of the most challenging aspects of this project was writing the code. Unlike previous projects, we couldn’t find many similar examples on YouTube, which meant we had to conduct numerous experiments to get the system working. These trials took considerable time, but they were essential for refining the algorithm and ensuring accurate sensor readings.
We encountered difficulties when calibrating the fire sensors and setting the appropriate detection distances. ChatGPT was incredibly helpful, guiding us through several key programming challenges and offering efficient solutions to problems like sensor calibration and movement coordination.
					// Pin Definitions
const int flameSensorRight = A0; // Flame sensor on the right side connected to analog pin A0
const int flameSensorLeft = A2; // Flame sensor on the left side connected to analog pin A2
const int flameSensorFront = A1; // Flame sensor on the front connected to analog pin A1

#define enA 3 // Enable pin for Motor A
#define in1 2 // Input 1 for Motor A
#define in2 4 // Input 2 for Motor A
#define enB 5 // Enable pin for Motor B
#define in3 6 // Input 1 for Motor B
#define in4 7 // Input 2 for Motor B
#define LED 13 // LED pin to indicate fire detection

// Variables
int flameRight, flameLeft, flameFront; // Variables to store flame sensor readings
int threshold = 500; // Sensitivity for fire detection (lower is more sensitive)
int dangerThreshold = 200; // If the fire is closer than this value, the robot will back up

// Setup function
void setup() {
// Set motor control pins as outputs
pinMode(enA, OUTPUT);
pinMode(enB, OUTPUT);
pinMode(in1, OUTPUT);
pinMode(in2, OUTPUT);
pinMode(in3, OUTPUT);
pinMode(in4, OUTPUT);

// Set LED as output
pinMode(LED, OUTPUT);

// Start serial communication for debugging purposes
Serial.begin(9600);
}

// Main loop
void loop() {
// Read flame sensor values
flameRight = analogRead(flameSensorRight);
flameLeft = analogRead(flameSensorLeft);
flameFront = analogRead(flameSensorFront);

// Print sensor values to the serial monitor for debugging
Serial.print(“Right: “);
Serial.print(flameRight);
Serial.print(” Left: “);
Serial.print(flameLeft);
Serial.print(” Front: “);
Serial.println(flameFront);

// Check if fire is detected by any of the sensors
if (flameFront < threshold || flameRight < threshold || flameLeft < threshold) {
// Fire detected, move toward the flame
if (flameFront < dangerThreshold || flameRight < dangerThreshold || flameLeft < dangerThreshold) {
// If the fire is too close, back up
moveBackward();
blinkLED(100); // Blink LED faster as fire gets too close
} else if (flameFront < threshold) {
// If fire is in front, move forward
moveForward();
blinkLED(300); // Blink LED slowly while approaching fire
} else if (flameRight < threshold) {
// If fire is on the right, turn right
turnRight();
blinkLED(300); // Blink LED slowly while turning
} else if (flameLeft < threshold) {
// If fire is on the left, turn left
turnLeft();
blinkLED(300); // Blink LED slowly while turning
}
} else {
// No fire detected, move forward and turn off the LED
moveForward();
digitalWrite(LED, LOW);
}

delay(100); // Small delay to stabilize sensor readings
}

// Function to blink the LED at a specified rate
void blinkLED(int flashDelay) {
digitalWrite(LED, HIGH); // Turn on LED
delay(flashDelay); // Wait for the specified delay
digitalWrite(LED, LOW); // Turn off LED
delay(flashDelay); // Wait for the specified delay
}

// Function to move the car forward
void moveForward() {
digitalWrite(in2, HIGH);
digitalWrite(in1, LOW);
analogWrite(enA, 100); // Set speed for Motor A
digitalWrite(in3, HIGH);
digitalWrite(in4, LOW);
analogWrite(enB, 100); // Set speed for Motor B
}

// Function to move the car backward
void moveBackward() {
digitalWrite(in1, HIGH);
digitalWrite(in2, LOW);
analogWrite(enA, 100); // Set speed for Motor A
digitalWrite(in4, HIGH);
digitalWrite(in3, LOW);
analogWrite(enB, 100); // Set speed for Motor B
}

// Function to turn the car right
void turnRight() {
digitalWrite(in2, HIGH);
digitalWrite(in1, LOW);
analogWrite(enA, 100); // Set speed for Motor A
digitalWrite(in3, HIGH);
digitalWrite(in4, LOW);
analogWrite(enB, 0); // Stop Motor B to turn right
}

// Function to turn the car left
void turnLeft() {
digitalWrite(in2, HIGH);
digitalWrite(in1, LOW);
analogWrite(enA, 0); // Stop Motor A to turn left
digitalWrite(in3, HIGH);
digitalWrite(in4, LOW);
analogWrite(enB, 100); // Set speed for Motor B
}

// Function to stop the car
void stopMotors() {
digitalWrite(in1, LOW);
digitalWrite(in2, LOW);
digitalWrite(in3, LOW);
digitalWrite(in4, LOW);
}
Our Experience
Completing this project in a short time frame was both challenging and rewarding. One of the major obstacles we faced was the absence of similar projects on YouTube, forcing us to rely on trial and error. This added to the time spent, but it also enhanced our understanding of both hardware and software components.
The coding process, in particular, was a major hurdle. We spent significant time testing different fire detection thresholds and tweaking the sensor response. ChatGPT proved to be a critical resource, helping us resolve bugs in the code and guiding us toward a more efficient implementation
Final Thoughts
In the end, we successfully built a working fire detection robot car that accurately tracks the location of a fire and triggers an alarm upon detection. Despite the numerous tests and time spent on debugging, the final result was worth the effort. Seeing the car in action made us realize that all the time and energy invested were well worth it!